google.com, pub-0409865497112903, DIRECT, f08c47fec0942fa0
Finding something to celebrate, appreciate and be thankful for every...single... day !

Sunday, November 30, 2014

Peppermint Eggnog -- Candy Crushing it for Christmas


It's officially the Christmas Season -- time for fun and festive food and drink. 

I don't know about you, but I am just too busy to go out gathering eggs and nogs to make eggnog from scratch. We buy a jug of it at the supermarket  -- but just because it isn't home-made doesn't mean it can't look and taste like it is!

We topped it with a swirl of whipped cream and a bit of crushed candy cane -- then tossed in a whole candy cane as a festive swirly stick. 

It's not all about looks though, ( It's all about that bass, 'bout that bass, 'bout that bass, no treble ) we want it to taste great too! Adding a candy cane really adds a pop of peppermint that tastes, smells and looks like Christmastime. 

This same whipped cream and candy cane treatment is amaze-balls on hot coco as well. Go the extra step of adding some peppermint schnapps if you really want to be full of the holiday spirit -- and spirits.

If you are wondering how one might go about crushing the candy cane, I am sure there are lots of ways to do this -- none of which involve playing the insidiously addictive Facebook game Candy Crush

We used a mortar and pestle. It worked well and made me feel like I was concocting a magical holiday potion -- maybe one that cures mistle-toe in elves.

I am sure a hammer and a ziplock bag would work just as well though in a pinch (for crushing candy canes -- not treating elves with mistle-toe. That would be cruel).

Now when a candy cane breaks as I pull it out of the box I don't feel so bad  -- all the more for beverage garnish!

UPDATE! Some of you have written in sharing that you are crushing your candy canes in a food processor set to 'pulverize.' What a great idea, especially if you are making a lot of it for a holiday party! Thank you all for sharing your tips!

UPDATE AGAIN!: Some of you have asked where I got these gorgeous clear glass pedestal mugs. If you'd like some of these mugs to grace your holiday table, or a lovely mortar and pestle similar to the ones pictured above, I found some on Amazon. Links added below. Enjoy!


Saturday, November 29, 2014

Cranberry Sauce!


If your family is like mine, and wants the jellied cranberry sauce from the can -- jazz up that oh-so-classy can shape with a few fresh cranberries on the side as garnish. 

I think I'll tuck a few fresh mint leaves among the cranberries next time as well! 

♫ I don't think you're ready for this jelly...cranberries's too foodilicious for ya babe♫

Please accept my apologies for putting the song Bootilicious in your head, but my thought is that maybe if it transfers to your head it will stop being in mine!

Silliness aside, I hope you had a happy, healthy and beautiful Thanksgiving. I also hope that you are able to fully and deeply feel and see all the love, beauty and everyday miracles that surround you!

Happy Thanksgiving!

Thursday, November 13, 2014

Dining Room Flooring in Progress Before and After DIY Renovation Project


After 27 years, I think it is safe to say that we got our money's worth out of our 80's linoleum floor. I have been mentally removing it for at least a decade now and cropping it out of pictures ever since I started this blog.  

I finally tackled this DIY (Do It Yourself) project armed with only 2 screw drivers, a pry bar, a box cutter/razor and locking pliers. 

Should be easy, right?  Just pop up the old sub-floor and reveal the gorgeous hard wood below. 

As you can see in the first picture at the top, removing that first board was exciting and wildly satisfying, because it meant there would be no turning back! You can't just cut a 4x4 square out of the dining room floor and change your mind!

So, on with the adventure! Board by board I pried them all up, revealing...well...52 year old hard wood floors with potential...and .....a BILLION staples to remove.

Hours upon hours on the ground with the trusty locking pliers and a bruised opposable thumb that is quite opposed to this abuse, but we are finally pulling into the home stretch of the first step of removing the old floor.

As I write this first post in the series there is only one small board (and the million or so staples holding it in place) left to remove. Not bad for only 2 days of work!

I'll be posting new pictures and updates as I go, so check back often. I'll link to the follow-up posts here.

Total spent on this project so far: $0.00

Here is what it looks like now..in progress! 

Friday, November 7, 2014

Parmesan Crusted Chicken

Parmesan Crusted Chicken Recipe

We saw this recipe idea in a Mayonnaise commercial, so you know its not the healthiest of recipes, but we tried it once and it soon became the favorite chicken dinner of everyone in all the land (or at least in our house).

Pictured here, we served it with peas and red potatoes, but this chicken goes great with all veggies.

Here is the recipe along with our extra tips!

1. Cut chicken breasts to thin cutlets. We like to plan it out so we can buy a big package of whole chicken breasts at only $1.99 a pound or less -- then as soon as we get home we fillet the chicken into tons of nice THIN cutlets that we slip straight into ziplock bags and pop them into the freezer.

When we need the chicken we just pull out the already pre-prepared chicken to use in all sorts of different chicken dishes. The chicken is safely frozen so it won't go bad, all the prep work is done, and we are set for about a month worth of chicken at a time.

2. Preheat oven to 425 F degrees

3. Lightly oil (Extra Virgin Olive Oil) a baking sheet. We like to use Release foil that REALLY cuts down clean up time.

4. Mix a half a cup of mayo mixed with a quarter cup Parmesan cheese

5. Spread mixture on the chicken fillets

6. Sprinkle lightly with Italian Seasoned bread crumbs

7. Pop in oven for 20 minutes 

8. Hold onto your socks because it's so moist, delicious and flavorful that it'll knock yer socks off. Seriously, everyone we served this to LOVED it and we've served some very picky eaters!

Pepper Pumpkins and Mashed BOOtatoes


Pepper Pumpkins and Mashed BOOtatoes! 

I actually made them this year, and here are the pictures to prove it!! (and illustrated six step how-to guide and recipe below)

Every holiday season I start decorating and preparing just a little bit earlier than the start of the season -- which lulls me into falsely believing I have plenty of time to prepare and create all the fantastical holiday projects that dance through my head.  Yet somehow I go from being the early bird planner to the last minute loser every year without having any idea what happened to all the time between.

For YEARS I have planned to make stuffed peppers carved as Jack-O-Lanterns and mashed potatoes in the shape of ghosts that I rename mashed "BOOtatoes" but somehow Halloween passes before I can bring my Halloween dinner visions to life.

Well this year it finally happened! We made my Halloween dinner dreams come true! It was fun, festive and most importantly DELICIOUS.

So, here is the recipe we used and the step by step pictures along the way. This is recipe was created and tweaked to be more healthy by my mom, the lovely and talented artist Peggy Hickey.

Stuffed Peppers
Ingredients

Peppers
3 Orange Bell Peppers
1 half pound (85% lean) chopped beef
1/4 cup dry uncooked oatmeal
1 half a small onion diced
1 tablespoon Gravy Master

Sauce
1 can (16 oz) tomato sauce
2 tablespoons brown sugar
2 tablespoons apple cider vinegar

Steps illustrated below!


Preheat the oven to 385 F degrees.

I started with the lovely orange peppers that I see in the store every year, only this time I bought them early, forcing myself to make this meal before the peppers went bad. 

I treated the little orange peppers just like pumpkins -- cutting around the top as a 'lid' just like when carving a Jack-O-Lantern.

This made it quite easy to pull all the seeds out in one easy step.

Cut the seeds off the 'lid' and clean out any stray seeds inside.

Toss the seeds, but keep the 'lid' for later.

Then the fun part of carving the 'face'.

Channel your inner child and give each pepper it's own playful or spooky personality.

Don't make them too scary or you'll be afraid to eat it!

Make the stuffing by combining:

1 half pound (85% lean) chopped beef
1/4 cup dry uncooked oatmeal
1 half a small onion diced
1 tablespoon Gravy Master

Fill each pepper pumpkin with the meat mixture.

Don't pack it too tightly or it may not cook evenly.

Put their lids back on and pop them in the oven!

Bake for 45 minutes at 385 F degrees.

I DARE you not to smile back at them when you see their little faces smiling out from the oven --it's not possible.

While they are in the oven, start the sauce by combining the following:

1 can(16 oz) tomato sauce
2 tablespoons brown sugar
2 tablespoons apple cider vinegar

Combine tomato sauce, brown sugar and apple cider vinegar in a small pan. Heat until the sugar dissolves and it's nice and hot. Don't overcook.
Serve with mashed potatoes spooned into ghost shapes and use peppercorns as eyes and mouth. 

You could use a pastry bag for the ghostly mashed BOOtatoes, or you can artfully dollop the potatoes - snowman style.

I used a plain ole spoon and placed a large dollop on the plate, then a medium one on top of that and a small one on top. Pay extra attention to the peak on the top dollop because that will make the ghosty head. 

Open the top of the pepper pumpkin and pour sauce inside the pepper so it oozes out creepily.

This sauce is tangy and sweet and a perfect compliment to the peppers.

And thats it! 


I've wanted to make this meal for so many years, and we finally did it! 

Okay...full disclosure. We made these on November 4th !! 

But in all fairness, the Halloween decorations were still up, and being after Halloween meant no trick or treaters to interrupt dinner, and we had lots of leftover candy for dessert!

Also, we are always looking to create healthy meals, and ground beef does not typically make it into our meal plans. Peggo had the great idea of adding the oatmeal to the stuffing with the rationale that the beef may raise cholesterol, but Oatmeal lowers it, so they cancel themselves out! While that science may or may not be completely sound, the oatmeal does bulk up the meat filling so you get a nice big portion without feeling too terribly guilty!

Oh My Gourd! What is a Spaghetti Squash?


Have you ever heard of Spaghetti Squash? 

During the Halloween season, the name alone may conjure up images of a mad scientist splicing together the DNA of a pumpkin and a plate of pasta, but the reality is a lot less spooky. 

So, where do you land on the spectrum of Spaghetti Squash knowledge?  It's likely you fall into one of three groups;

Group A - You do not know what Spaghetti Squash is and I could easily convince you that it involves a plate of spaghetti and a blunt object, or that it might be some sort of strange fetish that involves sitting on pasta.

Group B - Not only have you heard of Spaghetti Squash but you have made it yourself. Perhaps you consider yourself a bit of a Spaghetti Squash expert and under your clothes you wear a leotard with a giant S on the chest, denoting that you are a superhero of squash.


Group C - Something between the extremes of group A and Group B - in other words, a normal person.


My goal in this article is to either introduce you to this venerable veggie and be right here with you at the moment that you say to yourself "OH MY GOURD!! spaghetti really is coming out of this squash!" Or to distract and disorient you before you come to the conclusion that I might be a Spaghetti Squash Stupidhead -- which I totally am.


If you are like me, you probably have seen Spaghetti Squash at the local market and thought that they were just slightly anemic pumpkins that stayed indoors reading while the other pumpkins were out in the sun running around the pumpkin patch.

Compared to a plump orange pumpkin, Spaghetti Squash are pale and thin, but they are not just nerdy undernourished pumpkins. They are packed full of nutrients, vitamins, antioxidants, fiber and all sorts of other healthy stuff that makes health food bloggers and nutrition experts quiver with delight.

Also, if you are shaped like a pumpkin, and looking to slim down, Spaghetti Squash is a great way to painlessly cut calories. It has about 40 calories per serving, compared to pasta at about 200 
(in other words, about 160 calories saved at dinner to spend later on cookies). So you can have a huge guilt free plate of spaghetti without any fears that someone will carve a face into you when you wear orange clothing. 

Most importantly, it tastes good and is easy to make. What more could you ask for?
(Cookies. You could ask for cookies)

So let's get started!


Step 1:  Don't be afraid -- go buy a Spaghetti Squash. Gather up your courage and walk boldly to the spaghetti squash display at your local market. When choosing a squash, pick a nice firm one that feels heavy for its size and is free of blemishes and soft spots. While choosing, pick up several to feel and compare them. Thump them lightly also, because it will make you look like you know what you are doing.


Step 2: Cut the squash in half from top to bottom. Easy-peasy -- should be just like carving a pumpkin on Halloween, right?  Not exactly. 

As you can see in the picture, the shell is thicker and more dense than a pumpkin. My knife got stuck a few times, and once I had cut all the way around the entire circumference of the squash, the two halves did not gracefully fall open into two perfectly cut halves. 

What worked best for me was working my way around the edge slowly, patiently and carefully  -- then reaching the end of my patience and prying the halves apart like a she-beast while making overly dramatic grunting sounds reserved for use only when splitting a Spaghetti Squash, opening a jar with a tight lid, and when crowning without an epidural.  


Step 3: Scoop out the seeds and stuff - just like when making a Halloween Jack-O-Lantern! This is fun! We can go trick-or-treating later right? 
#IGotARock


Step 4: Tis the season for seasoning. You can drizzle a little bit of EVOO (EVOO= Extra Virgin Olive Oil -- It is important that you don't use the kind-of-still-a-virgin olive oil, or Olive Oil that is dating Popeye or other sailors). Sprinkle salt and pepper or any spices you like. I am pretty sure these steps are optional though if you prefer not to sacrifice any virgins when you cook.


Step 5: Flip them over (open side down) to cook on a baking sheet.
We used parchment paper, but only because Martha Stewart peer pressured us into doing it. It probably isn't necessary but we had some in the house and using it made us feel very fancy.

Step 6: Cook for about an hour at 425 F degrees, or until you can't bear the building anticipation any longer.

Step 7: Remove the Spaghetti Squash from the oven, flip it over and freak out when you don't see any spaghetti. When you calm down, grab a fork and lightly drag it over the surface of the inside of the shell and see the spaghetti strands forming. Squeal with delight and call friends and family members over to watch as you dazzle them with your new found Spaghetti Squash skills. 

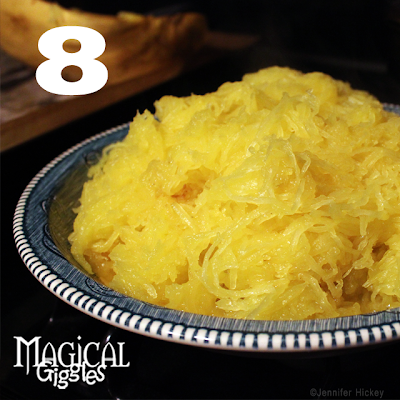
Step 8: Scoop out the spaghetti and serve! We paired it with our favorite tomato sauce and some Parmesan cheese -- just like regular pasta. 

That's it! You're done! There are lots of tasty and adventurous recipes out there to try (which I will share here when I try them), but for a first try this very basic approach is quick, easy and will give you your first taste of Spaghetti Squash Success.

I hope that this article has helped to squash any fears you may have had about trying Spaghetti Squash!

Don't forget to take lots of pictures and post them on your blog and all over social media so you can show the world you are trying new things, living life to its fullest, creating spaghetti squash celebrations just for the heck of it and that you are NOT a Spaghetti Squash Stupidhead!

Thursday, November 6, 2014

Cheap Plastic Tablecloths into Lovely Festive Decor!

Using cheap plastic tablecloths in unconventional ways to make a bold decorative statement with color indoors or out!


They look so good in the package with their bright colors that will surely brighten up your party table, but then you unfold them and they are so thin you can see right through them, and they are covered with unsightly fold lines -- a party table nightmare!

But, there are some really great ways to use these table cloths to really make a bright bold party statement on a tight budget!

The following is not so much a tutorial as it is a few pictures of the process I used to make Halloween bows for the back of chairs.

The basic instructions are to just cut the table cloth to ribbons -- literally.


I found it quickest to unfold the table cloth only partially so I could cut several layers at once.


Then I notched out the ends for a decorative ribbon finish.


Then I tied the ribbons into bows or in this case, decorative faux bows. 

For the Halloween bows I tucked some orange raffia in the bows to give a bit of color so it wouldn't look too dreary even for Halloween.


This is basically just a way to make lots of cheap colorful bows to decorate for the holidays. I plan to use pink and red for Valentines Day,  green for St. Patty's day, and pastel colors for Easter. I used black and orange for Halloween and red for the 4th of July (shown below) and I plan to use red again at Christmas with lots of pine boughs!