All too often I have seen artists that take themselves far too seriously.
I imagine these people as Star-Bellied-Sneetches (by Dr. Seuss) with their Sneetch snoots pointed up in the air as they snort and guffaw at art or artists that they don't think are artsy fartsy enough, or whatever it is that snooty-snoots look down upon.
I'm not going to put either of us through any of that in this article.
Sit back and relax -- let your guard down -- this is a pretension free zone where I am going share my mysterious, highly classified art secrets how I made some art stuff.
This is a digital painting, and despite what some of the snooty-snoots whisper to one another at their exclusive star bellied parties, digital painting is every bit as valid an art form as traditional paint on canvas.
Some people seem to think that digital painting is manipulating a photo in some way -- or some sort of magical computer generated hocus pocus. It's not.
It is a nearly identical process to painting on canvas -- it is using the same skills that are developed over a lifetime of experience and practice.
One great difference is that it's FREE! FREE canvas and FREE paint! Starving artists rejoice! We can finally paint whatever we want without plunking down 95 bucks for one measly itsy bitsy tube of Cobalt Blue!
Enough of my ranting -- on to the show!
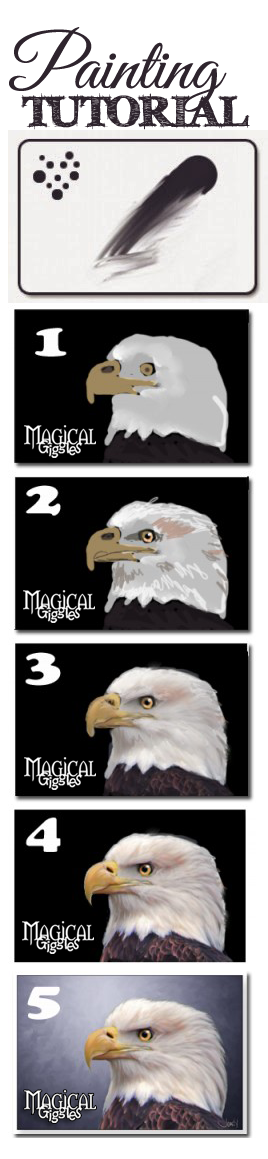
 Before we start, lets look at the brushes I used for this painting. This is a digital painting, and the 'brushes' are just the shape of the pointy-thingy that you paint with.
I used the basic brushes. One with a hard edge and one with a soft edge (top picture).
The brush below that is the one I use for moving the 'wet' paint around and blending work (we'll get into that later).

1. On it's own layer (separate from the background) -- I drew the rough shapes.
This is quick and rough and just for basic placement, but it really makes the painting take form right away.
Sometimes I practically close my eyes so that I am looking through my eyelashes -- this makes it impossible to see the details so it forces me to focus on basic shape and form without concerning myself with anything else -- it also lets me take a micro-nap so that I am well rested for the steps ahead (hardy-har-har).
2. More blocking in shapes, but a bit more refined, and bringing in more colors.
When painting a living creature, I find it best to refine the eye as quickly as possible because that is the most important part of the face and it's a great anchor to work around.
It also causes the subject to magically come to life just like placing the magician's top hat on Frosty the Snowman. Happy... Birthday!
This stage is bold and quick as well -- squiggly scribbles and bright un-blended color everywhere with a hard edged round brush.
 3.Now it's time to do some real painting,blending, shaping and contouring using the paint laid on in the last step.
This stage is like gliding your paintbrush through the wet paint on a canvas.
I used the wet media blending brush (pictured below) for making soft wet painterly strokes (bye bye squiggly lines).
 Here is an example of one stroke through solid color.
See how it moves the color like gliding a paint brush through a blob of wet paint on the canvas?
This is a wet media brush (on smudge) with strength set at about 50 percent.

4. Then back to the paint brush again, adding in more colors and washes of color while blending on the fly.
More and more refining, adding details, adding more color.
Back and forth painting and blending, over and over, adding color and working with the 'wet' paint.
5. Usually I am working on the background or at least laying down the main color for the background while I am painting on another layer.
Unfortunately I did not capture that in these screen shots.
I don't know why I thought the steps would be clearer for a tutorial with the background removed -- especially when the background color and the subject have to live together in the same space with the same light source.
So, contrary to the pictures, I do not recommend working on the background layer after the fact. It should be (and was) created hand in hand but on a separate layer.
Also, I do not recommend inviting a large bird of prey into your art studio, asking him to pose for a portrait and then foolishly slipping a bald joke into your polite banter. You can see in his eyes just how angry this made him. Stick to light conversation about the weather -- and jokes about ducks. Eagles LOVE duck jokes.

There is always lots of work(and fun!) in refining the details, painting and accentuating the light and shadows, adding unexpected pops of color.
This is truly the most satisfying part of the process for me.

Details like feather edges are a pleasure when working on a separate layer.
You can glide the brush through the 'wet' paint to create wispy feather shapes and edges, pushing and pulling the color without fear of ruining the background.
 That about sums it up.
This tutorial is just a basic overview of one process used by one artist on one painting.
Take this information for what it is worth.
Please don't ever compare your art or your skill level to other artists, and don't ever let those with 'stars upon thars' make you feel like you are less than you are.
You are unique and beautiful. Put a piece of yourself on canvas and let it shine -- If all else fails just paint a star on your belly.
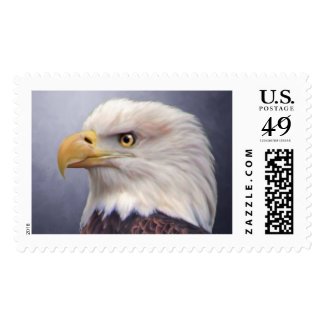
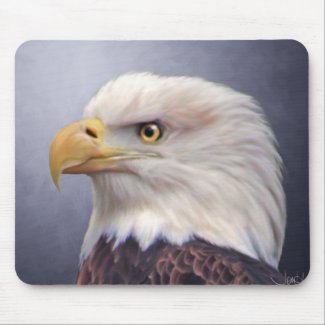
And now for some shameless self promotion!
If you'd like to own a print of this eagle painting, or you'd like this image on a mouse pad, postage stamps, collector plate, mug or tons of other awesome and easily customized goodies, click the links below for my Fine Art America page as well as my Zazzle shop.
Thanks for stopping by, and have a GREAT Day!